
Clean a ceiling fan without making a mess using these simple steps
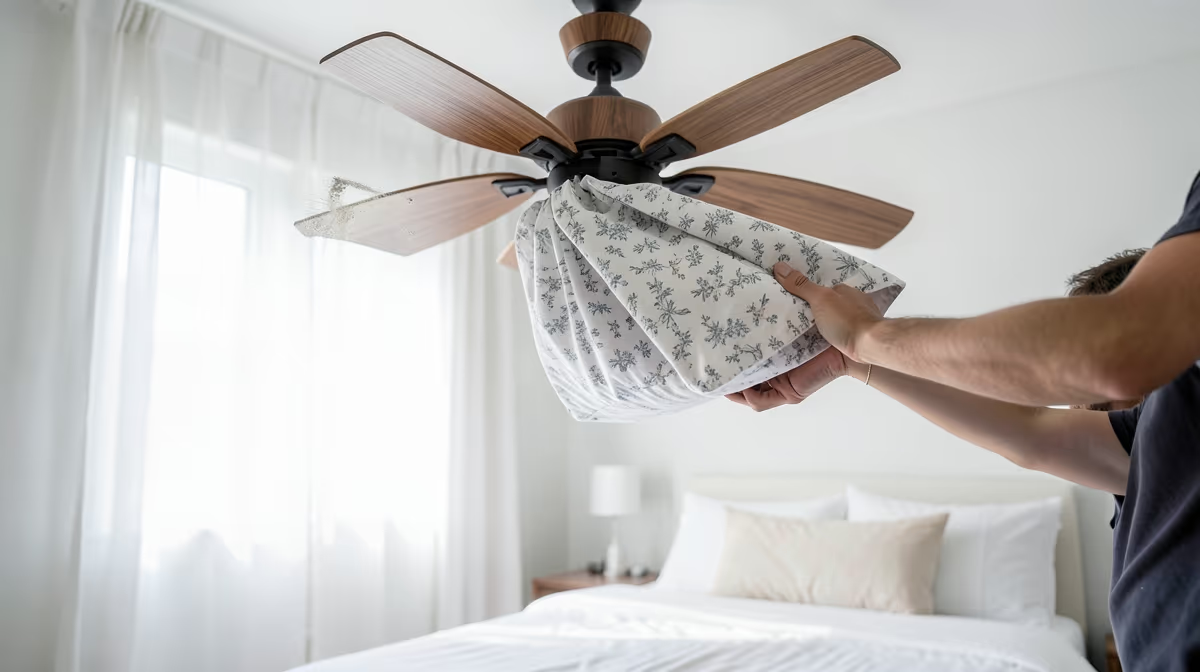
Dusting your home often feels like a losing battle, especially when you look up at your light fixtures. Learning to clean a ceiling fan without making a mess is the ultimate secret to keeping your living spaces pristine without sending a cloud of debris onto your bed, carpets, or furniture. Instead of letting accumulated grime rain down on your clean floors, you can use a few smart, targeted strategies to trap every speck of dust right at the source.
The most effective way to clean fan blades without spreading dust is to slide an old pillowcase over each blade, using the fabric to wipe the surface and trap the debris inside the bag.
The Pillowcase Method: Your Best Dust-Free Weapon
When you use a standard duster on overhead blades, gravity inevitably pulls the loose particles downward, coating everything underneath in a layer of gray grime. The pillowcase method completely bypasses this issue by enclosing the blade entirely while you clean it.
As you slide the fabric sleeve over the blade, the cloth acts as a barrier. When you press down and pull the pillowcase back, the fabric scrapes the top, bottom, and edges of the blade simultaneously. Any loose dust, hair, or cobwebs immediately drop into the bottom of the pillowcase rather than dispersing into the air of your room. It is a simple, highly efficient loop that leaves your floors completely clean.
Essential Supplies for a Mess-Free Clean
Before you begin, gather a few basic household tools to make the job quick and seamless. Having everything on hand prevents you from having to climb up and down your ladder repeatedly.
- An old, clean pillowcase (cotton or flannel fabrics work best as they naturally grip dust)
- A sturdy step stool or ladder
- A high-quality microfiber cloth
- A spray bottle filled with water and a single drop of mild dish soap
- A pair of safety glasses (optional, but helpful for keeping stray particles out of your eyes)
Step-by-Step Instructions for the Perfect Clean
Follow these steps to safely and cleanly restore your fixtures to pristine condition.
- Switch off the power. Ensure that the wall switch is turned off, and if your fan has a remote control or pull chains, make sure the unit is completely powered down.
Always ensure the ceiling fan is completely switched off at the wall, and the blades have stopped rotating entirely, before you set up your ladder.
- Position your ladder safely. Set up your step stool or ladder to the side of the fan rather than directly underneath it. This positioning allows you to reach the blades comfortably without straining your neck or losing your balance.
- Mist the inside of the pillowcase. Spritz a very light mist of your water and dish soap mixture inside the opening of the pillowcase. The slight dampness helps the dust cling to the fabric and prevents any ultra-fine particles from escaping into the air.
- Slide the pillowcase onto the first blade. Gently slip the pillowcase over the entire length of one fan blade, keeping the opening relatively flat against the sides.
- Wipe and pull. Place your hands on the top and bottom of the blade from the outside of the pillowcase. Gently press your hands together and slide the pillowcase back toward the tip of the blade. The dust will peel off and remain trapped inside the pillowcase.
- Repeat the process. Manually rotate the fan to bring the next blade toward you. Avoid pulling on the blades with excessive downward force, as this can bend the brackets and cause the fan to wobble later. Slide the pillowcase over the next blade and repeat the wiping motion.
- Wipe the motor housing. Use your slightly damp microfiber cloth to gently wipe down the center motor housing and any pull chains or light globes. This area can collect static dust that a pillowcase cannot reach.
- Clean up and wash. Carefully take the pillowcase outside, turn it inside out over your outdoor trash bin to shake out the heavy dust clumps, and then toss it straight into your washing machine.
Alternative Methods for Stubborn Grime
While the pillowcase technique is ideal for dry dust, fans in specific areas—like kitchens—often accumulate a sticky, greasy film that requires a different approach. Kitchen grease acts like glue for airborne dust, creating a stubborn layer that a dry cloth cannot easily remove.
| Method | Best For | Mess Level | Setup Time |
|---|---|---|---|
| Pillowcase Technique | Regular maintenance and heavy dry dust | None | 2 minutes |
| Vacuum Brush Attachment | Cobwebs and light, dry dust | Very Low | 5 minutes |
| Damp Microfiber Wipe | Sticky kitchen grease and film | Low | 3 minutes |
For greasy blades, spray a mild degreasing solution or a mixture of warm water, vinegar, and dish soap directly onto a microfiber cloth. Wipe each blade thoroughly from the root to the tip, rinsing the cloth in clean water as needed to prevent spreading the sticky residue.
Common Mistakes That Create More Mess
Avoid these frequent cleaning pitfalls to ensure your cleaning session remains quick and mess-free.
- Using dry feather dusters: These tools do not trap dust; they simply flick it into the air, allowing it to settle on your bed, carpets, and upholstery hours later.
- Spraying cleaners directly onto the fan: Applying liquid sprays directly onto the blades or motor housing can cause moisture to seep into the electrical components, potentially causing rust, motor damage, or electrical shorts.
- Neglecting the top of the blades: Because the top surface of the blade is out of sight, it is easy to ignore, but this is where the vast majority of the dust accumulates.
- Pulling down on the blades: Applying too much downward pressure while cleaning can warp the metal brackets, leading to a noisy, unbalanced, and dangerous wobble when the fan is turned back on.
How Often to Clean Your Ceiling Fan
To keep dust levels low and prevent heavy buildup, aim to clean your ceiling fan blades once every two months. If you live with shedding pets, suffer from indoor allergies, or run your fans continuously during the hot summer months, you may want to increase this frequency to once a month.
Dust accumulates on fan blades because as they spin through the air, friction builds up a charge of static electricity on the leading edges. This electrical charge actively attracts tiny dust particles from the air, bonding them to the surface. Keeping up with a regular, simple cleaning schedule prevents this static bond from forming a thick, dark layer of grime that is much harder to remove.
Frequently Asked Questions
Can I use a vacuum cleaner to clean my ceiling fan?
Yes, you can use a vacuum cleaner equipped with a soft brush attachment to remove loose dust from the blades. However, you must move slowly to prevent the brush from knocking dust off the edges of the blades onto the floor below.
Why does so much dust stick to ceiling fan blades?
Dust sticks to fan blades due to static electricity created by the friction of the spinning blades rubbing against the air. This charge attracts dust particles and holds them flat against the surface, where they eventually combine with ambient moisture to form a sticky layer.
How do I clean a sticky ceiling fan in the kitchen?
To clean a greasy kitchen fan, wipe the blades with a microfiber cloth dampened with a mixture of warm water, dish soap, and a splash of white vinegar. This solution cuts through grease without damaging the wood or metal finish of the blades.
Should I use a damp or dry pillowcase to clean the fan?
A very slightly damp pillowcase is ideal because the moisture helps lock in fine dust particles and prevents them from airborne drift. Avoid making the pillowcase soaking wet, as excess moisture can warp wooden blades or drip into the fan motor.
Conclusion
Cleaning your ceiling fan does not have to result in a dusty mess on your furniture and floors. By using a simple pillowcase to slide over the blades, you can trap dust at the source and keep your living space clean. Combined with a damp microfiber cloth for greasy residue and a regular cleaning schedule, this straightforward routine will keep your fans running smoothly, quietly, and cleanly year-round.


